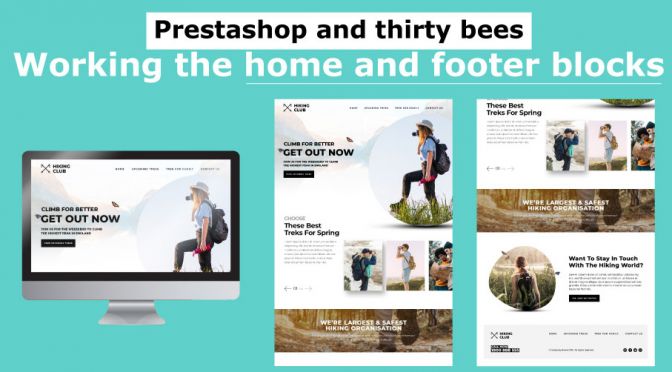
In this series episode we are going to be Learning Prestahop-thirtybees home and footer blocks. I mentioned the last lesson series Working with Banners effectively, that we are gonna be working on blocks, and we did! The slider module is actually nested on a block, as well as the navigation menu module which the Block Top Menu module.
Prestashop-thirtybees home and footer blocks completes the homepage.
Together by adjusting the content of the different blocks and removing unnecessary content, the footer and home blocks completes your ecommerce homepage. You will see it done in 30 minutes, pretty simple enough, that anyone can follow and configure Prestashop modules in no time!
This is the 6th lesson in this series, Learning Prestashop or thirtybees properly.
A standard Prestashop-thirtybees homepage is already quite complete in it’s default configuration. Which is good for starting merchants that often starts small. You got everything you need at your finger tips with this ecommerce platform, especially thirtybees. In fact, the functionality we can find being loaded at default install is quite too much actually, we can definitely disable some of them if we want to. And I always recommend people to disable the elements that are not essential to get a clearer implementation and also easier to maintain content that is lighter on the server.
Footer blocks show you exist
As we move deeper into this lesson, we are going to touch on the Prestashop-thirtybees home and footer blocks. Footers are an important part of an ecommerce website or any website for that matter. It is where we tell people about resources of the business, links to see the experience of the business in this particular field, an accessible phone number, a real address and a email address.
Footer blocks also show your customers you exist in real life to remove whatever doubt they may have about you and your business.
In this series episode, we are going to learn a lot of things. I have listed them below for you to see and check later as you progress in this tutorial:
What we are going to learn in this Prestashop-thirtybees home and footer blocks tutorial?
- Configure the featured products
- Disable the block of best sellers.
- Work the Latest Blog Post.
- Configure the newsletter block settings as default.
- Change the social networks module
- Adjust the CMS block
– elements to reassure the customer
– present your company and your experience - Leave the minimum of useful links in the footer.
- View your business details.
Let us get started with configuring the Featured Products!
To configure the featured products and give the block an really good and unique name. We need to login to our back office panel. Once logged in, go to the Modules and Services menu >> search for “featured products”.

Click on “Configure” button. It should take you to the configuration page of the module.

The first you should do here is choose the number of products to display in the featured product area.. The default is set to 4 products per row. You can set it to whatever number you like. Four products in a row sounds just about right for me! Some like it to have 6 products.
The next one is the category to pick the products from. At this point, you should be about to know the categories available to you. You have to enter in the ID of the category you want the product to be taken from. If you do not know the ID, hover on the “Catalog” menu, then right click on “Categories”, choose “Open link in new tab”. By default thirtybees comes with 3 categories. Depending on how you populated your store, this page will look like the image below:

You see the ID’s 3,6,7 in the left side of the screen? That is what you will have to enter in the category field of the featured product module. Enter the category ID you want. The default is set to “2”, which is the “home” category.
Display featured products or not
Next is you have to choose whether to display the featured products of your ecommerce store randomly or not. The default is set to “NO”.
And the last one you are going to do here is to determines for how long the featured products block stays cached. You can set any number your like. The number corresponds to minutes. Default is set to “0”.
Click the “Save” button to save your work!
That wasn’t so bad, was it?
Disabling the Best Seller Module
Now, let’s play around a little bit. Let’s disable the best seller products display module.

To do this, again, go to the Modules and Services list, search for the “best seller” by typing the word “best seller”.

click on the small black arrow after the “Configure” button, to make your changes.

It will automatically run the disable function and remove the Best Selling module, like so. Refresh your front page, you should see your page without the best seller module, like so.

Configuring the Blog Module
Next is we configure the Latest Blog Post. To do so, you need to do the pattern we have gone through so far in the first two items in the list of todo’s.
Once in the Blog configuration page, enter the details of your blog, if you have a disquss account, get the username and enter it at the bottom of the page. There are a lot you can do here. Feel free to tinker with it and see how it goes.

I am a believer of people. So, go ahead and make your changes. Do not be afraid to make mistakes.
The Newsletter Module
As with what we did with the previous items, let’s configure the newsletter module.
Go back to the Modules and Services page, type newsletter, it should give your the newsletter module, click on “Configure”. In here, there are only two things we will need to change:

Go ahead and enable the email verification and the email confirmation buttons and set them to “YES”. Leave the others as is.
You can upload a CSV(comma separated value) to import customers, if you have one. We will reserve that for future tutorial.
Making changes in the Social Media Networking module
Next item in the list is to configure the Social media module. Again, same thing we did in the previous items, go to the Modules and Services page, search for “Social”, choose the Block Social Networking Module.

Enter the url of your Social media profile in the right field. Enter as many as you have social media account. Most Ecommerce owners activates around 3-4 social media icons. Go ahead and activate yours. It should like the image below:

We are almost done with our homepage. Remaining items todo are:
- Adjust the CMS block
– elements to reassure the customer
– present your company and your experience - Leave the minimum of useful links in the footer.
- View your business details.
Tinkering the CMS block
Let’s adjust the CMS block. To do this, once again, go to the modules and services menu, search for “cms“, it should give you the following:

Click on the “Configuration” button to the right of the page to configure the CMS content. The first you need to do is to check the title of the information block to your desired name. The default is named “Information”.

Click on edit to see what is inside.

The default CMS category is the “Home” category, which is the mother category, it’s ID is 1. You need NOT change anything here. But I would like you to notice that the “Home” is uncheck, you can set this to check if you need to. All the others is checked, that means that, they are available to be included in the footer information menu. If you are wondering where did these came from, these content items are created in the “Preference >> CMS”.
More CMS configuration
Let’s move to the second half of the CMS configuration page, by default only the “Terms” and “About us” are checked. You may check as many as you like.
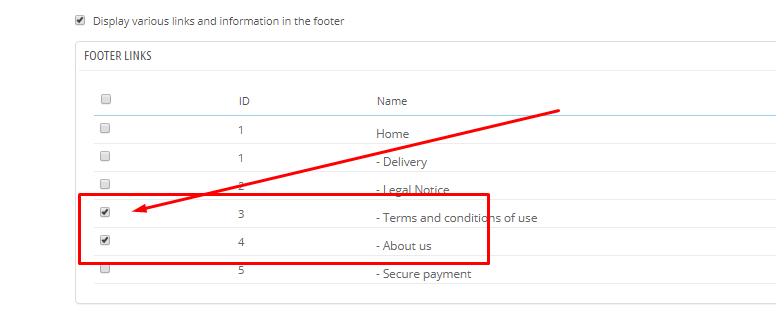
The last part that we should do here is check or uncheck the things that you needed to check or uncheck the various links as you desire.

This will all be displayed in the Information block at the footer like the image below:

We will leave the “MY ACCOUNT” block as is, but let us check on the “STORE INFORMATION” block. The store information block is where you enter your physical address as well as other contact information.
Let’s Check out your business details.
To do so, go back to the Modules and Services page, type “store info” in the search field. You should see a screen like this.

Choose the “Block Contact Infos” to configure the Store Information block. Click on the “Configuration” button and make you changes accordingly.

It is very important for an ecommerce store to have a local address as well as contact number. What this does is give a semblance of trust from customers. Click save when you are done!
Yayyyyy!! We are done with our website homepage!
That wasn’t so bad, was it?
We did a lot of learning Prestashop-thirtybees home and footer blocks!
We Configured the featured products module, learn how to disable and enable the best sellers block module. Configured the Latest Blog Post. Configured the newsletter block settings as default. We learned where to make changes in the social networks module. We adjusted the CMS block so that it contains the elements to reassure the customer, and then we made changes to the business details so that we present your company professionally.
Hope this tutorial has been helpful to you, I know it is. We have a lot more to cover in Learning Prestashop-thirtybees home and footer blocks. See you next series episode.
For a full documentation of thirtybees ecommerce.


