Have you heard of private sales or direct sales or a member-only ecommerce? Yes, these are the shops that force you to register so that you can take advantage of their offers. This is what we will discussing today!
Member-Only Ecommerce are direct sales technique used to get customers to register before they are able to see the details of the offer or the product. This technique is a good way to get the email of the customer before they even purchase the product. It is also an excellent way to grow your emailing database for your email campaigns later on.
The General Rule in development
As a general rule, it is always wiser to start with what you already have at hand rather than investing in new modules every time. For example, if you want to get into the private sales or direct sales or member-only sales market, or whatever you call it -Prestahop-thirtybees comes with such functionality and it is easy to configure it, really. This handy feature is so under-utilized that nobody even bother to check if this really exist with their system. And it is absolutely FREE!
Why Do A Members-only Shop?
What is the point of a private sales store? It’s a bit fashionable at the moment, but the first objective is above all to arouse interest in forcing the internet user to register on the store. After that, you have to be convincing in terms of prices – buyers would naturally expect big discounts! However, this can also be used with VIP sales strategy.
The niche VIP strategy… you know? The concept is similar, but except that we do not break prices, we target a specific clientele with carefully chosen products that can please, with a very “strict” aspect on the type of client. Example, you can set up a private shop or a category for the sale of figurines catered to an exclusive clientele of pure Geek without breaking the prices.
If you are trying to get started in this niche, try to be original in your way of doing things, but avoid copying what large companies do by wanting to offer the same kind of products. Choose a different, segmented strategy!
With that said, in this tutorial, I am going to provide a resource so that you can right away get the hang of learning this wonderful feature that comes with the core Prestashop-thirtybees system.
Tutorial Resource and List of Tasks
1 x banner.psd file
Download sources
In this tutorial, we are going to go through the following stages of creating ourselves a new member-only ecommerce store.
- Deleting existing banners
- Integrating new banners
- Creation of a category with limitation and assignment of the product.
- Adjust category related error message
- Disable all extraneous modules
- Configure the basket module in no-ajax mode
- Add a new CSS rule in global.css
- Simulate an order with customer registration
Alright, let’s dive in!
Login to your back office and go to your Modules and Services menu! We are going to disable some default images that came along with the default install.
Deleting and Uploading the new banners
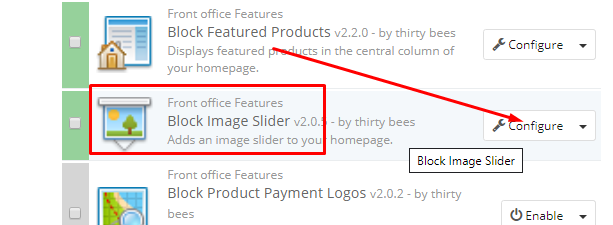
search for “block Image Slider” and click “Configure”, like so.
Once in the module configuration page, look for the “+” icon to add your new banner. It should bring you to a page like the one below:
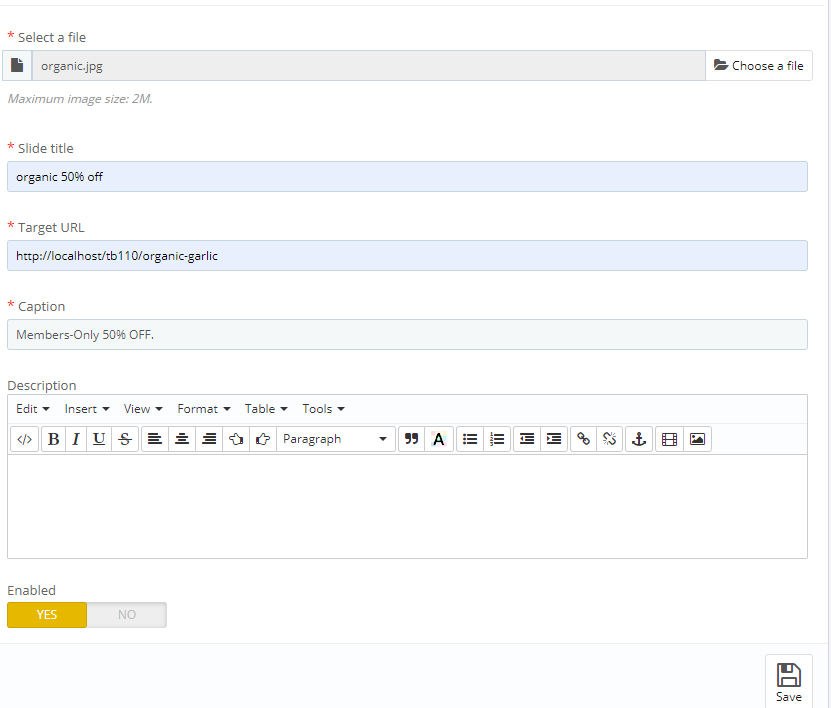
Enter the details of your banner. Place a dummy target URL for the moment. We will get to that later when we have created the category to point to. Click save.
In the banner list page, disable the default images. DO NOT delete them yet, as shown in the screenshot.

Save your work by clicking the save button.
Creating the Category and assigning the correct member-only permission
Go to “Catalog” menu, and click on “Categories“. Once in the categories list page, click the “Add New Category” icon at the top right. Enter you category name and details. For the sake of this tutorial, enter just the category name. Go back to it later and play around with it to make yourself more familiarize. Scroll down to the bottom until you see the “Group Access” options. Uncheck the checkboxes except the “Customer” group. Save your work.

This should make your new category accessible only by login in members! Pretty stuff!
Before moving on to the next task. Go back to the category you have just created, then scroll down to the bottom where you see the “Friendly URL”. You should see it just above the “Group Access”. Copy the text. We are going to use that for the target URL of the banner image we have created in the previous step. 
To complete your target url, attach the friendly url of your category to the URL of your webshop. For example http://localhost/tb110/organic-garlic, because my installation is named tb110 inside the root directory localhost.
Go to the homepage and refresh. Click on the banner, it should direct your to the page like the screenshot below:

Creating/assigning the products to the member-only ecommerce
To do this is simple. Go to your products list then click on “Add new Product“. Give your new product a name, then click on “Save and Stay” button.
Next is to associate the new product to the category. Click on the “associations“. Click on the “Home” icon, then select the category you created in the previous step. Mine is called Organic Garlic.

Click the “Save and Stay” button to save your work. Next, click on the “Price” menu. Give your “Retail price with tax” an amount, then scroll down and click on “Add new specific price“.

Apply your discount and set it to percent. Mine is set to 50%, like so.
Go to the homepage and refresh. You should see your new product and the category.
Disabling the Unnecessary modules
Let’s disable the “Block best seller” and “Block featured product” modules to give our member-only store a unique look. Go to your homepage and refresh. You should not be able to see the products in the homepage.
Add a new CSS rule in global.css
Let’s add a new CSS rule to our banner image so that opacity gets activated when customers hover over it. To do this is very simple. Go to your FTP, then look for the folder “theme” in your core prestashop-thirtybees files, then open the the theme you are using, mine is “niara” theme from thirtybees. Open the “css” folder.
The path should be: \themes\niara\css
Open the “global.css” in your text/code editor, then scroll down to the bottom and add the following css code:

Simulate an order with customer registration
At this point we are basically done with this tutorial. Now it is time to test everything! Let’s do that!
Go to your homepage then click the banner. It should give you the error message saying you are not allowed access. Click on the “sign in” menu at the top to create a new account, like so.

After creating the new user account, you should be able to access the member only product with no problem!
Congratulations!
You have just learned how to create a member-only ecommerce website!
For great resource on Prestashop-thirtybees check out our FREE tutorials:
Learning Prestashop-thirtybees
Using the Store Analytics Data to Your Advantage
Lots and lots of good stuff are available to your absolutely FREE!